
PowerWave
Size Available
3.4 | 3.7 | 4.0 | 4.2 | 4.5 | 4.7 | 5.0 | 5.3 | 5.7 | 6.2 | 6.8
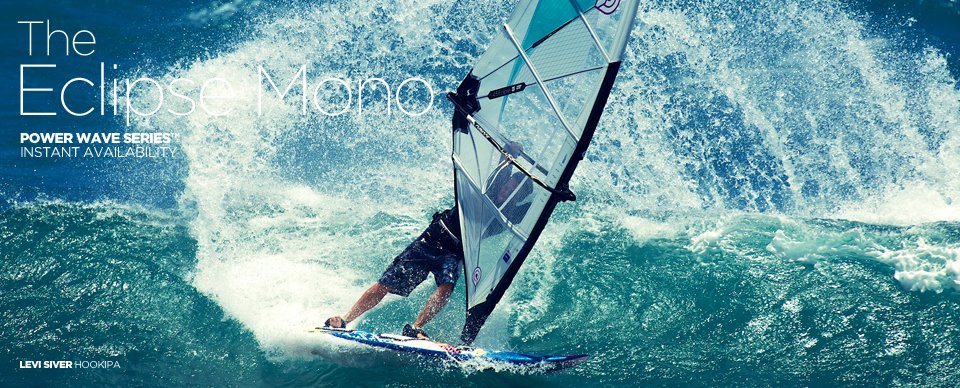
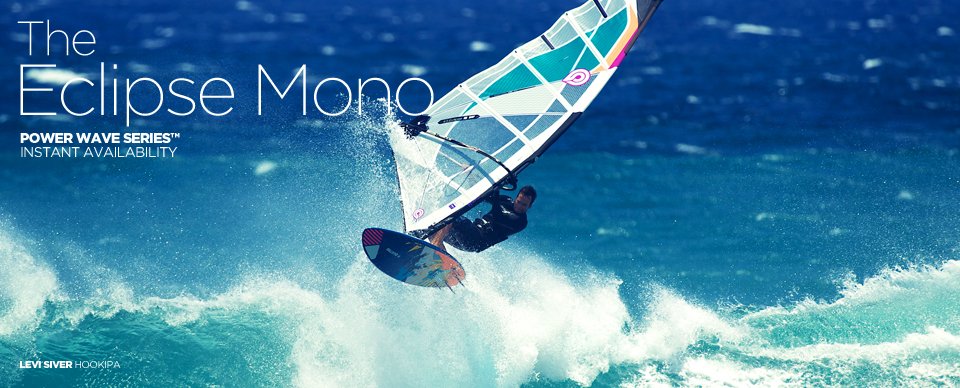
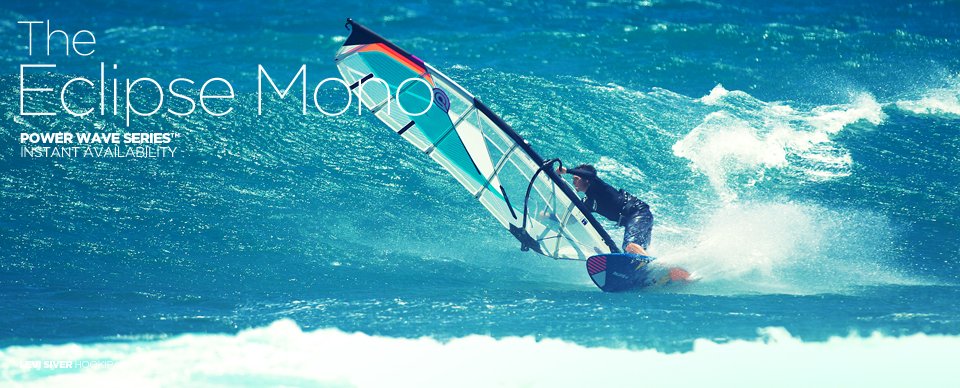
More window. More oceanscape. Less weight. Less effort. For further reduced weight and an even more direct feeling, we produce a Monofilm version of the Eclipse, called the Eclipse Mono, replacing the main X-Ply window panel with 7 MIL Monofilm. It is available in the same sizes as the Eclipse.
The clear window creates perfect visibility and a slightly crisper feel for those eager to squeeze the ultimate performance out of their gear. Like Levi Siver, who is using this very sail to make himself the Style Master we know him for.
The Eclipse Mono is also very desirable to use for Freestyle and Freestylewave applications, offering you even more lift than the original version, surpassing it’s juicy light wind power supply with direct delivery and great high wind control.
New for the current model are a much lighter construction weight, resulting in a stronger and lighter feeling on the water, as well as a stronger, more elaborated built. On top the Eclipse Mono now comes with more forward power delivery with improved high end control.


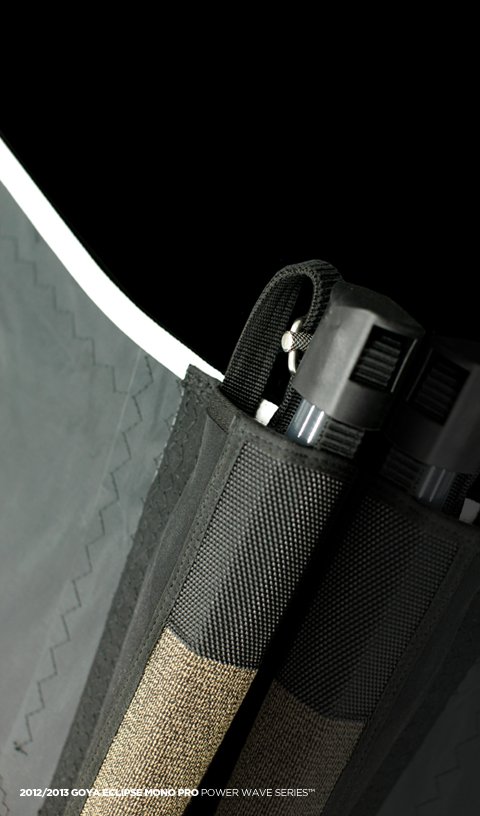
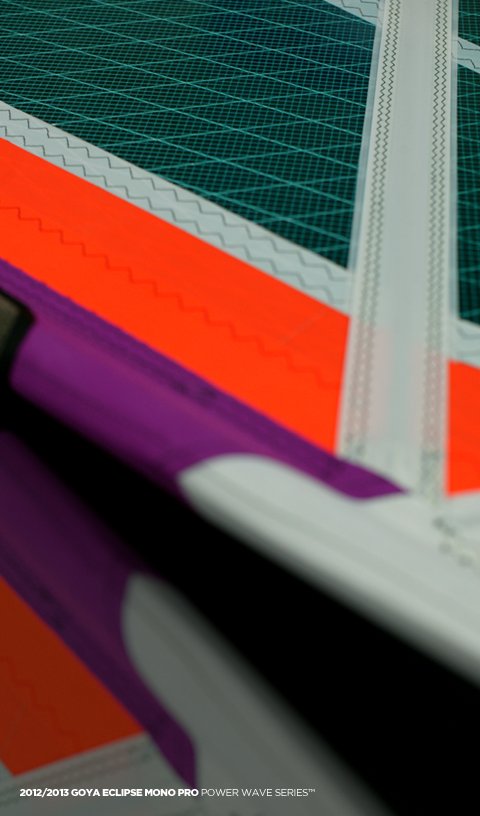
PRO Construction
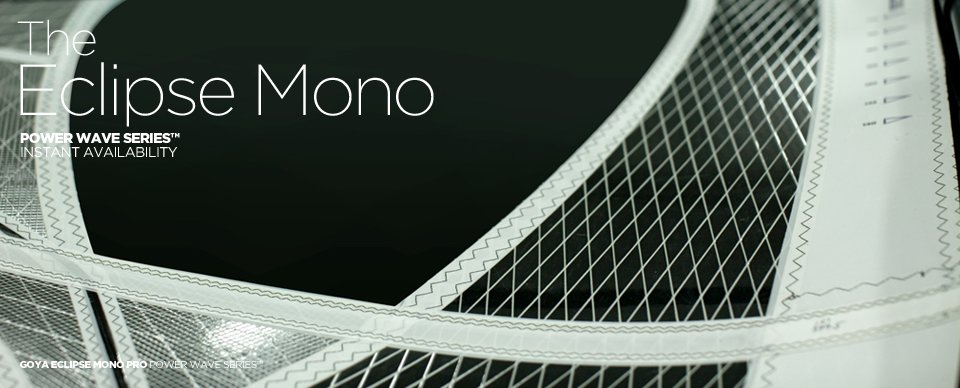
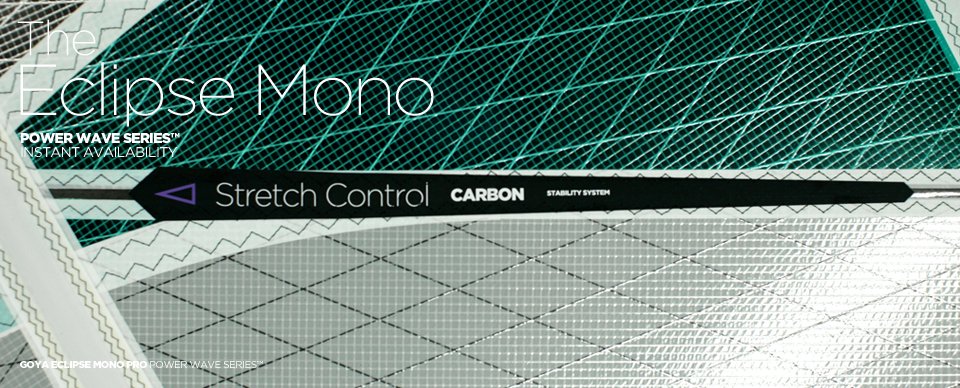
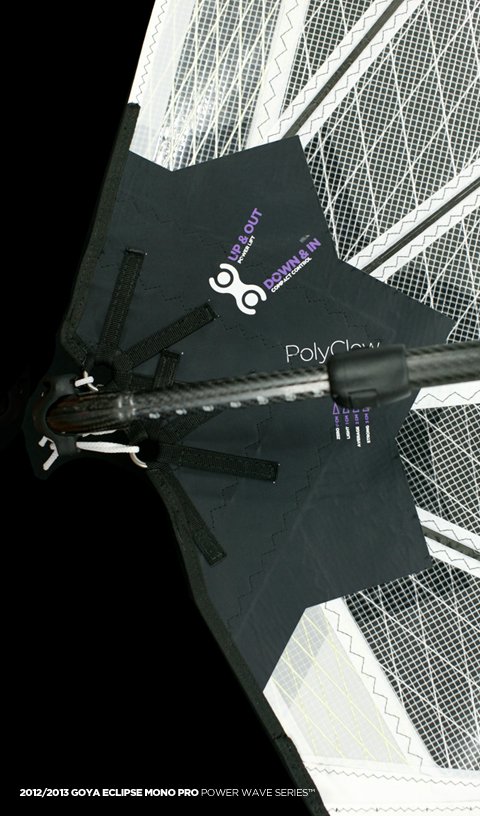
This sail comes in PRO Construction. Our most advanced sail construction combines light weight and excellent durability by blending the latest in scrim film technology and durable X-Ply. These premium sails are equipped with Carbon Stretch Control™ tendons, the Poly Clew™ angled outhaul system and Kevlar® Real Frame™ panels.
Colors
This sail is available in the following color combinations:
BLUE
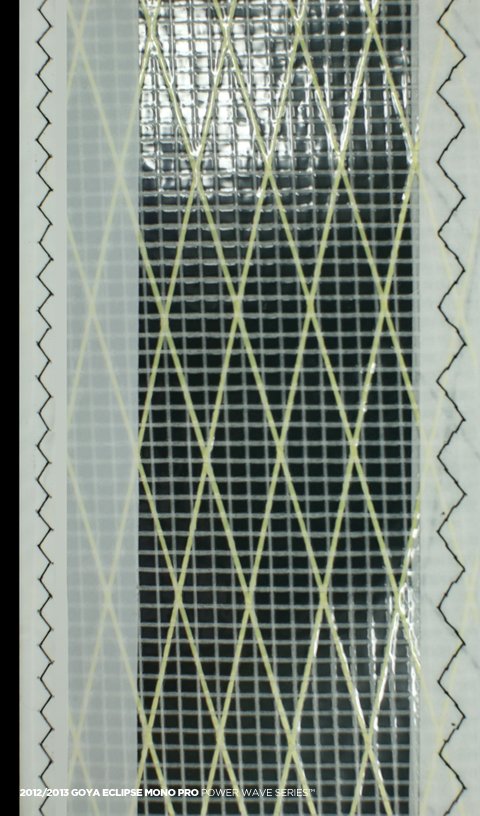
Scrim
This sail uses the new Goya unique Scrim, a super light alternative to regular materials, in extensive areas of the sails surface. Areas prone to more wear are featured in X-Ply.
Kevlar®
The perimeter of this sail is reinforced with Kevlar yarns, creating a real frame, not just the visual of such a thing.
Reduced Head
This sail features the Goya trademark reduced head leech outline. The Reduced Head works as if you were adding 5mm of tail rocker to your board, making it easier to go around tight corners. Further it reduces head “wag” and makes the sail much quieter in the hands, which increases your comfort and control, meaning more time for you on the water.
Mast
Get the best performance of this sail with a Goya RDM Direct Drive Mast featurning Diagonal Flex™ technology. Learn more


SEE THE PRODUCTS
IN ACTION
Goya video footage from around the world.


Rigging Guide
Please study the following rigging information carefully so you can get THE BEST PERFORMANCE AND MOST FUN out of your new Goya sail. It is recommended that you rig to the basic specs given for each sail as a starting point. OPTIMAL TUNING IS UNIQUE FOR EVERY RIDER, so please take the time to experiment with different settings and try them on the water to find the sail trim settings that are right for you.
For All Goya Sails
SAFE RIGGING
1. Before you start to rig, make sure you have all necessary parts with you and please be sure to rig downwind and well clear from the public.
2. Remove the sail from the bag, release the sail wrapper and slowly roll the sail out on the ground in the direction the wind is blowing.
3. Slide the top of the mast halfway into the mast sleeve. Then connect the bottom part of the mast and slide it in the whole way up, working the sail down the mast a bit at a time.
4. Make sure that the mast tip is firmly seated in the sleeve top or adjustable head cap. Also make sure that mast ferrule joint is completely inserted between mast sections.
5. Slide the mast extension into the mast, fold the tack fairing up to allow you to thread your downhaul rope freely. Slightly tension the downhaul, and then make sure that the mast tip/plug and ferrule joint are still in place before downhauling to the rigging mark on your sail. When you downhaul the sail, always use the strength of both your arms and your legs, and be sure to tighten your stomach muscles as you pull. Also be sure to check your downhaul rope frequently for safety and ease of use.
6. To avoid a “fly-away rig” attach your fully down hauled sail to the universal joint that is already securely fixed to the board. Pull down the tack fairing to cover the mast base extension and universal.
7. Slide the boom down from the top of the mast/sail and attach the front end of the boom to the mast at shoulder height or slightly higher. (Some mast/boom combinations may require a shim).
8. Adjust the boom end to the recommended length. Outhaul to it. On models featuring the POLY CLEW system, this is the upper clew ring.
9. Slowly tighten your battens until the wrinkles in your sail disappear. Be careful not to overtighten, otherwise, your battens will not rotate easily, and they might start bending into an S curve, distorting the sail shape.
10. Before you leave shore, look over all of your equipment, making sure everything is tightened and ready to go.
FINE TUNING
The best rigging advice is to add sufficient downhaul tension. It is best to start with a little too much tension and then tune from there. Use the rigging mark on the top of your as a guide for down hauling. Down haul the sail until the leech goes loose in to this mark. The sail will perform best with this downhaul setting in nearly every condition. The correct downhaul tension will provide easy handling in high wind, and also smooth efficient twist in lighter wind. For extreme light wind, it may be beneficial to reduce the downhaul tension a little to induce more shape in to the sail which will provide more power. The outhaul is the main power control for the sail. Start with the recommended boom length, and adjust according to your conditions and style- Less outhaul will create more power in the sail, and more outhaul will create a sail that is flatter, less powerful and more neutral feeling in the hands. Please note- you should never add too much outhaul to the sail, no matter how strong the wind- over out hauling will make your sail very unstable, gutless and difficult to handle. Note that battens do not necessarily rotate around the mast although with some stiffer or bigger-diameter masts, the front of the battens may come closer in.
POLY CLEW OUTHAUL TUNING
The models GURU, ECLIPSE and BANZAI feature the POLY CLEW Outhaul System. With a longer/upper, and shorter/lower clew position, the POLY CLEW gives you the option to tune the sail for optimal performance by matching the sails power delivery and handling characteristic to your individual style. Use the upper clew ring for maximum lift and drive. Use the lower ring to achieve a more compact and flexible feeling rig. Bigger sailors tend to prefer the upper ring. More maneuver-oriented sailors tend to prefer the lower ring. Or you can thread your outhaul through both rings and feel the benefits of both positions.
PROBLEMS & SOLUTIONS
|
Wrinkles around batten pockets |
Slowly add tension to the battens |
SAIL CARE
Avoid rigging on rough surfaces such as asphalt or concrete. When you roll up your sail, make sure that it is free of sand and that you do not crease it. When you are not sailing, put your sail in the shade. Never leave your sail at the beach with sand blowing across it.
MORE TIPS
Re-tune your settings after you use your equipment for the first time, as materials will stretch slightly. Re-check your outhaul whenever your downhaul setting is changed. Always have at least 1 cm of outhaul tension. A stiffer mast will make your sail more powerful, and a softer one will make your sail less powerful and more flexible feeling.
SAFE DE-RIGGING
Release the outhaul tension and unthread the rope from the sail and release the downhaul tension and unthread the rope from the sail. Detach the front end of the boom from the mast and remove the boom. Slide the sail off the mast, a bit at a time, while rolling it up the same way it was rolled originally. Store it in the sail bag. If it is wet with salt water you can store it as is, if it is wet with fresh water, you must first dry it thoroughly.


